 |
| Before |
 |
| After |
I was needing a school cabinet and found this one at the thrift store for $35. I brought it home and got to work. I LOVE spray paint!! Here's what I did to refinish it.
I removed the plastic out of the door. I had originally planned to replace this with beadboard but decided to just spray paint and reuse what's here.
Then I sanded the wood on the doors and wiped them with a clean cloth.
Here's the paint I chose to use. I don't have any special attachment to this brand, I just liked this color best at the store.
When painting, you should do quick strokes and NOT go back and forth continuously. Make sure to let up on the nozzle when changing directions.
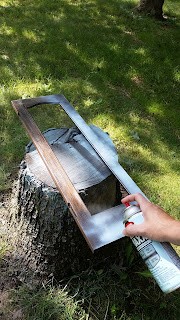
Here's the before and after of the doors. While the middle plastic pieces were out, I spray painted them white with some paint I had.
My daughter primed the cabinet for me with white Kilz primer. Once that was dry, I laid it down and sprayed it with the same spray paint. Honestly, it was too large of a surface to spray but I was already in so I finished and it turned out fine. The whole job took 2 cans of paint.
These casters were a great bonus to this piece. I took a picture of them to get good ideas of how to mount casters to other pieces of furniture.
Then I spray painted all the hardware.
The final product. I still need to make a top for it which should be easy with our new Kreg Jig! :) I'll post that when it's done.
This is now our Homeschool post. Above the cabinet is a large picture frame that I removed the backing from, spray painted with my left over paint and turned it into a dry erase board that displays my children's daily to-do list. I place their initial beside their job each day and they erase their initial when the task is complete.


No comments:
Post a Comment